How to set up Apple Time Machine style backing up
with use of hard links
Backup with the use of hard links through @MAX SyncUp is:
- Uncompressed full backups available in any file manager
- A rational use of disk space
- The ability to configure the frequency and depth of backups
As the old joke goes, system administrators divide into ones who do not yet back up data and those who do. Day by day, the number of those fitting into the second category is steadily rising. Seriously, nowadays there is no need to convince anybody it is necessary to back up their information. It is more reasonable to consider the advantages and the disadvantages of the various backup strategies.
In this article, we consider one of the successful backup strategies realized in the Time Machine program: the built-in backup utility for Mac OS X. Moreover, we explain how to set up similar backup strategy using @MAX SyncUp.
How does it work? By default, Time Machine executes a backup every hour. Hourly backups are kept for a 24-hour period. After that, daily backups are kept for a one-month period. Following the one-month period, weekly backups are kept indefinitely. Every backup is a folder, which has a name in backup-date-and-time format. This folder contains uncompressed copies of folders and files as consistent with the date that the backups were created. You can easily return to the previous versions of files and folders or restore accidently deleted data, but there is no need for that in the special programs. It is enough to open the required folder in the file manager and copy the files to be restored. It seems this backup strategy requires a lot of disk space, equal to the product of the total volume of backed up data and number of backups. Nevertheless, this is not the case because the following method is used when creating a backup: the files that have been changed since the previous backing up are only copied in the new folder; meanwhile, so-called hard links are created for the unchanged files. You can read about hard links in Wikipedia in more detail. Herein, we only mark hard links allow you to place the same file in several folders at once. Hard links are created very quickly and do not take a lot of disk space. Consequently, every following backup only requires the disk space that approximately equals the total volume of files that have been changed since the previous backup was made. As a rule, the number of those files is not large, so the subsequent backups take up less disk space than the total volume of backed up data. Thus, this backup method combines facilities of full backups with the effectiveness of incremental backups.
However, Time Machine has one serious disadvantage: it is available only for Mac users. For the Windows environment, we recommend using @MAX SyncUp to execute the described backup strategy.
How do you set up @MAX SyncUp to back up data with use of hard links in Apple Time Machine style?
- Run @MAX SyncUp and select the New profile item in the File menu.
-
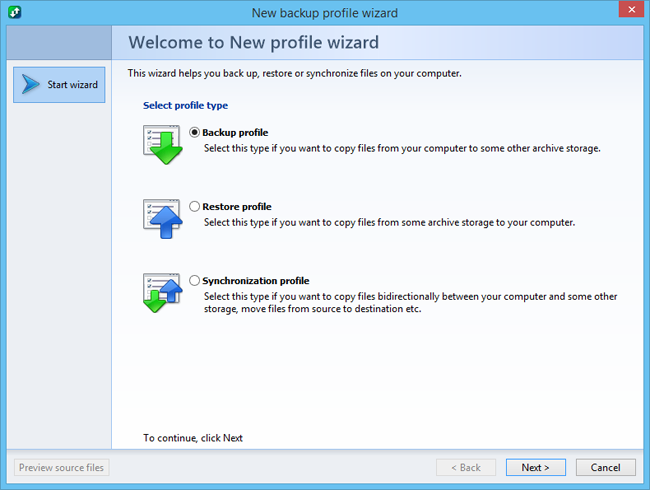
Select Backup profile and click Next.
-
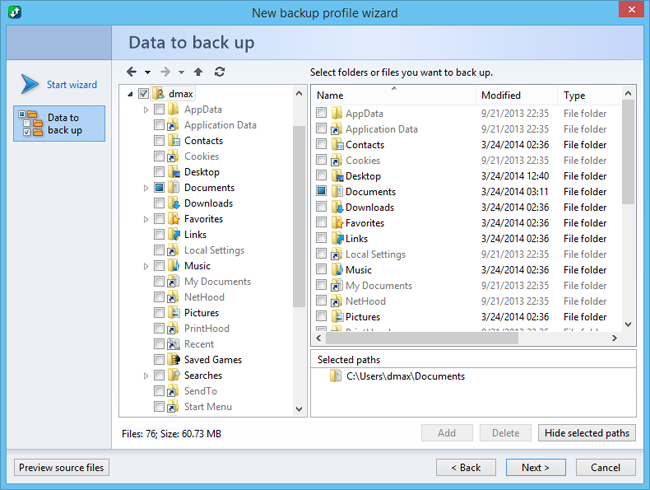
Choose the folder or folders to be backed up and click Next.
-
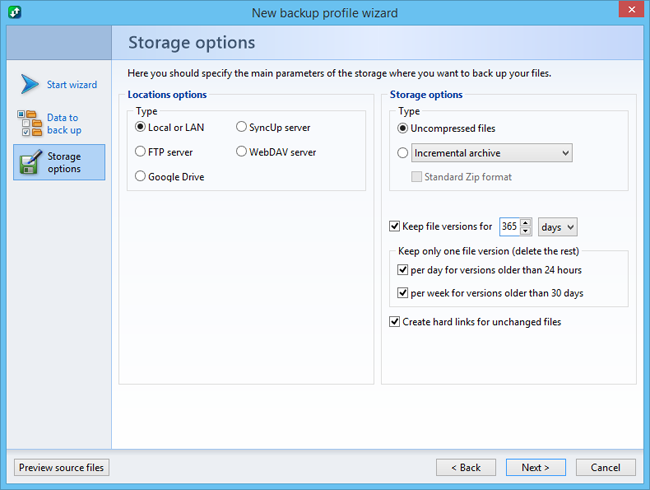
Let’s say you want to back up data to an external hard drive connected to your computer. Make sure the Location type is checked off as Local or LAN.
-
Next, make sure Storage type is checked off as Uncompressed files.
-
Let’s say you want to keep backups for one year. Specify "365" in the field Keep file versions for ... days. After that, check the settings of your old backups thinning and select the option Create hard links for unchanged files. Then click Next.
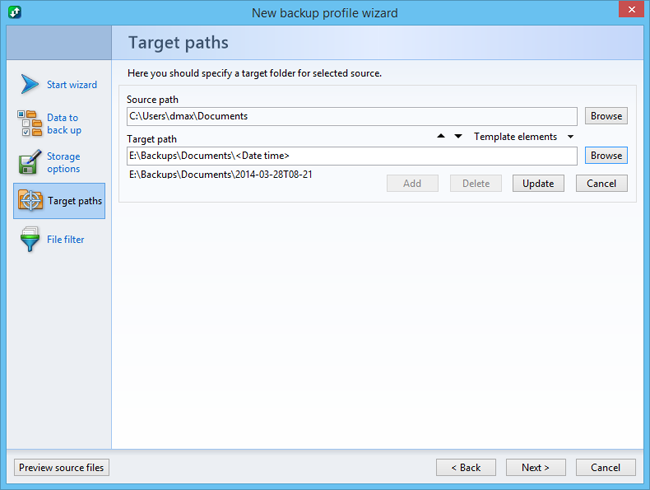
- By default, the name of the source folder and <Date time> template are added to the selected path. You can change the path format in accordance with your preferences. However, you should take into account that the target path should include the template depending on the profile start time.
-
Let’s say you want to start the profile one time for a day unconditionally and also every 30 minutes if the source files are changed. Check the Run on schedule option, specify start time, select the Execute profile every 1 day option and then set up the If files have been changed run every 30 min option.
-
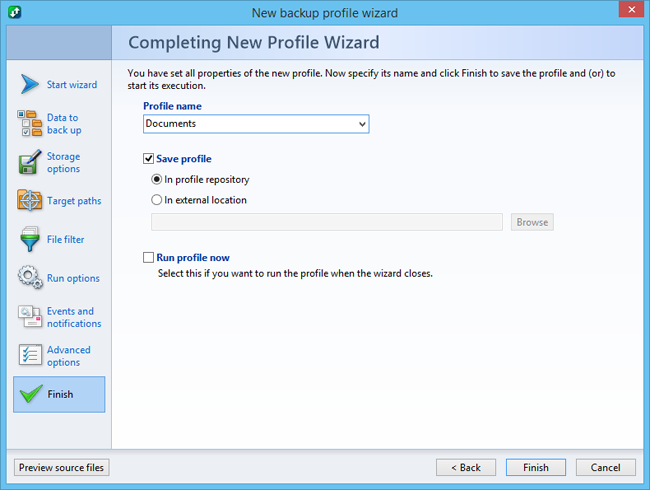
Check the profile name and change it if necessary. Lastly click Finish.
This opens the New profile wizard. On the first tab, you should select the profile type.
On the next tab, you should select data to be backed up.
This opens the next tab where you can configure the location and other options of backups.
You can set up remote backing up with use of hard links, too. In this case, you should select Location type as SyncUp server, install @MAX SyncUp on the remote computer, and set up SyncUp server.
On the next tab, select the folder that the backups will be placed in.
The next tab is for setting the profile’s start time.
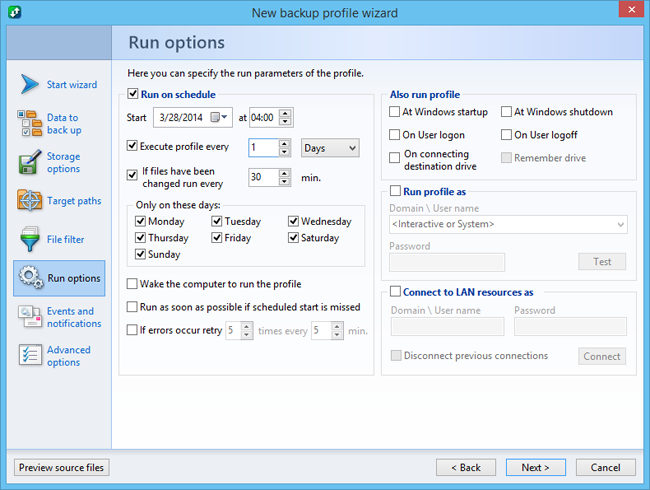
These settings mean that all changes will be saved every 30 minutes, and the computer will not do useless work if the files are not changed. In any case, backups are only created if files have been changed since the previous backing up. That being said, the last option allows you only to decrease costs connected with checking if the files have or have not been changed.
On the last tab, the profile name should be specified.
That’s all. Now the backups of your files are kept every 30 minutes automatically. The backups will be saved for 1 year. For backups older than 24 hours, one copy will be saved per day. For backups older than 1 month, one copy will be saved per week.
After some time, a situation resembling that in the picture below will be in the target folder on the external hard drive.
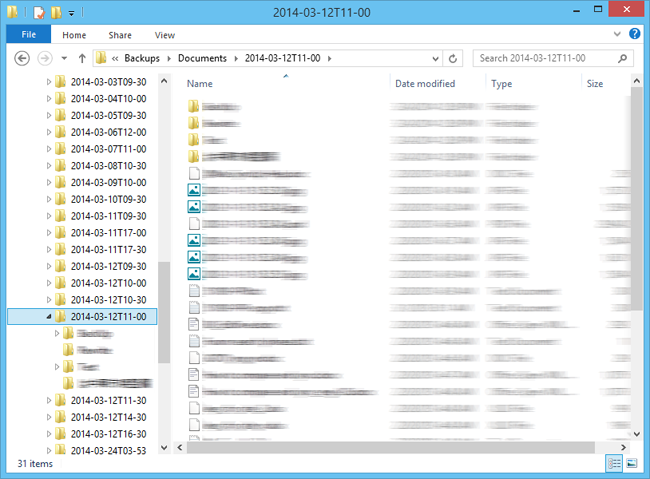
Here, every folder is an instant snapshot of the source folder at the appropriate time. To browse or restore an old version of a file, it is enough to open the necessary folder in the file manager and open or copy the required file.